Showing posts with label tips and tutorials. Show all posts

21 October, 2015

What Really Counts as Improv Quilting?


After a recent Improv with Intent class a student came up to me with deep concerns. Each student did their own project, with their own inspiration and their own execution. At the end of the day all the projects on the design wall displayed a wide range of styles and approaches. My wonderful student wondered just how much of it, however, was really Improv.

She looked around the room at people who had made triangles, strip sets, cut and resewed fabric, created specific shapes. When we came together at the end of the day people it no longer looked like our warm up exercises of random piecing. So was it still Improv?

There is a belief that unless you are picking your fabric blindly, not using a ruler, or making everything wonky it doesn't count as Improv.

So not true.

That is what I, and some others, might refer to as Pure Improv. It totally encompasses the true spirit of improvised quilting. But it is far from the only way to do it.


To clarify further, Improv is...

... taking a traditional pattern and making it without measuring pieces or worrying about perfect points. This often makes it wonky.
... sewing together random bits of fabric to become bigger pieces of fabric. These can be used on their own or as part of something else.
... taking a certain cut of fabric and sewing it to another with no preplanning about what goes next to what. Free form piecing.
... changing course midway - once, twice, or thrice (or more) - because you can.
... an attitude that allows you to not freak out when something goes wrong or off track while piecing a quilt top.
... being open to the direction your quilt takes or being okay with scrapping it when you hate it.
... as much about the process as the product.


You will automatically be bringing Intention to your work. Your intention can be a shape, a colour story, an image, a feeling, a place, a word, a symbol, a time. Even with Pure Improv there is an intention. It may be to use up all your scraps or you choose a specific colour way, but that is still intention.

When using an Improv approach to your project it is perfectly fine to bring order, square up, and otherwise define the components you are making. If you don't do this at some point you are asking for a bumpy quilt with puckers. I always tell my students that there is a time to bring back the ruler and rotary cutter, but go as far as you can without it. If you want to make a flat, squared quilt with the Improv pieces then you still need to follow those basic tenets of quilting - 1/4'' seam allowances, pressing, and squaring up (or, at the very least, shaping). For many people this then makes the Improv  feel fake. Not real Improv.

So not true.

Improv is an approach, a technique that starts with simply starting. You begin without knowing what the end product will look like. You are improvising the design as you go. Exactly how you do that will vary among quilters. It varies according to the skill level of the quilter, their comfort with improvising, and the intention they are bringing to the project.


As an example. If you've never worked without a pattern or a kit, simply sewing strip sets together without planning it all out may be enough to give you heart palpitations. People want to know every single step it takes to go from a pile of fabric to a quilt top. With Improv that is impossible to do. My strip set will look different than yours than your neighbour's. Improv for each quilter is as unique as your handwriting. We develop a rhythm and style that is all our own.

Improv provides insights to each quilter. We build confidence, curiosity, and authenticity in our work. That's on top of making a quilt that is distinctly unique. At the end of the day, if you felt like you were improvising then you were, no matter what anyone else says. As a teacher I often push my students out of the comfort zone. It isn't an accident either. I want you to challenge your own perceptions of how a quilt should be made or what colours can go together or how a block gets made. I might steer you away from the literal or towards it. Heck, we could even all start with the same Intention but will execute it differently!

For my student that day I went around the room and reviewed how each student took Improv as an approach and adapted it to the Intention they had. To be honest, I'm not sure she was totally convinced. Improv is a different mind set and so many of us have been trained in black or white on piecing techniques. What I, and any improv teacher can do, is teach you the general idea and give you confidence to do your own thing.


(Top photo, as well as the second and third from the bottom, are student work from my recent workshop with Victoria Modern Quilt Guild. The rest are my own projects.)

To learn even more about Improv quilting may I suggest my Creative Live class on the subject?

22 September, 2015

13 Reasons to Hand Baste With Needle Turn Appliqué


You might see an ugly mess of threads here. Frankly, that is what it is. But this mess of threads represents hours of work. Not work that I tore out in disgust or because of a mistake. Work that I intentionally put in then pulled out at the end of the process.

These are basting threads.

When I started sewing of any kind I, like many others, eschewed basting as a waste of time. Why baste if I can just pin and sew it? I thought basting was just an extra step that slowed down the entire process. And basting while quilting? Now that was just getting downright ridiculous.

Then I was proven wrong.

Basting is an absolutely integral part of hard appliqué. Taking the time to baste and baste properly makes a huge difference to your project - from process to finished project. A few months ago I was teaching a hand appliqué class and I had a student there for a refresher and simply because she loved the pattern. She was not inclined to want to baste like I was suggested but I encouraged her to at least try it for the class. If she hated it then she never had to do to again. By the end of the class, like me, she was a complete convert to a more detailed and time consuming baste. Neither of us are going back to the old way and here's why:

1. Basting holds everything in place so you don't have to worry about anything moving as you stitch. Your appliqué gets moved, manipulated, scrunched up, folded, and otherwise manhandled as you sew. If you aren't properly basted to start the appliqué won't stay where you want it to.

2. Because of the above, pins won't cut it. You can buy pretty little appliqué pins. They are usually shorter in length and with a small head. Super cute, but best used for holding your appliqué in place while you baste. All that handling of the block means a lot of pin pricks if you only use pins.

3. A few stitches to simply hold the appliqué in place doesn't cut it. That's because the appliqué will move along the edges ever so slightly as you sew. If you've only basted in the centre of the appliqué that means the appliqué rotates. In other words, it isn't staying where you want it to stay.


(Lesson learned on my Alturas blocks, they were always a little askew. Don't chintz out on basting.)

4. Baste on a flat surface, like a table, not in your hands or on your lap. This keeps the pin pricks to a minimum. It also makes it much easier to hold your basting threads in order.

5. Use old thread or bobbins that need to be emptied but you don't want to waste the thread. As long as it is not heavier than a 40W thread (the smaller the number, the thicker the thread, the bigger the holes left behind.)

6. Use a regular sewing needle, but not a huge one. I don't think it is necessary to use the tiny appliqué needles, but you could. But this is not the time to use a big embroidery needle just because that is what you can find. A Universal hand sewing needle is just fine. Again, the bigger the needle, the bigger the hole it leaves behind.

7. Double up your thread. I know, this makes it thicker. When you double up the thread you don't have to worry about constantly pulling your thread through the eye of the needle. If you are comfortable with a single strand, then go for it. I prefer to have it doubled up because that is easier for me.

8. Do not knot your basting thread. Just hold on to the first couple of stitches you make then they will be fine. Start from the back and do not pull all the way through, leave a tail about 1/2'' long to hold on to.

9. Use a running stitch to baste. Not a small stitch, but not huge either. So a simple up and down with your needle through both the background and the appliqué. If you are listening and doing this on a table top you can even turn that into a bit of a rocking stitch, taking 2-4 stitches at a time before pulling your thread.


Run your stitches 1/4'' from the edge of the appliqué. Every single edge of the applique. If you aren't comfortable eyeballing the 1/4'' and have a marking pen you trust (that is, it comes out), mark the line first. I don't think this is necessary. And if you stray from the 1/4'' here are there, do not worry about it. This is a guide as much as it is a basting stitch, not a seam line.

This is the part that no one likes. It totally seems like overkill. Trust me, it isn't.

10. Machine basting seems like good idea. It does go quicker and you can easily get that 1/4'' line. But the stitches are way more difficult to remove. It might save you time up front but it more than doubles the time at the end. Plus, you still have pins while basting and they poke you even more. Unless you use glue, but that is another issue.

11. Glue. It seems like a good idea, but I hated it. You have to be very, very careful not to get any of it on the edges or else your fabric will not fold over. It also makes things stiffer. That isn't a big deal, but it reduces the tactile enjoyment of hand appliqué. Yes, that is a thing.

12. Remove your basting stitches. All those hand stitches add a really interesting element to your appliqué and it might be tempting to leave them in. Remember, however, that they are not knotted and therefore not permanent in the fabric. If you love them so much replace them with hand quilting. Hand stitching basting comes out so, so easily too.

13. Embrace the process. It takes time, no doubt. So does cutting out fabric, sewing it together, quilting, and binding. If hand basting feels like such a waste of time then maybe hand appliqué isn't for you either. This is slow stitching, it isn't meant for a quick turn around. So accept what it is, put on a movie, pour a cup of tea (or open a beer), and stretch your fingers.

As I said at the beginning, it is totally worth it to baste your appliqué this way.

First, your appliqué stays where you want it.

Second, and more importantly, the basting stitch acts as a guide for your appliqué stitches. The fabric folds under at the edge, to meet the stitches. This gives you a consistent seam allowance. That means your curves and corners go where they are supposed to in a smooth line. It is pretty much impossible to end up with points on the edge this way.

Taking the time to baste properly means your appliqué goes smoothly. And you can actually relax as you do it. Frankly, that's kind of the point, right?

I must give full credit to Carolyn Friedlander for converting me to this form of basting. She is an appliqué whiz and designs her appliqué patterns so well. If not for her I wouldn't be doing this hand work at all.


20 July, 2015

All the Labels

At one point I used to be great about labelling my quilts. I planned and plotted my fancy label, carefully lettering and hand stitching it on. Then I got busier, faced deadlines and snotty noses, and frankly, got lazy. It is time to rectify the situation. I have a lot of quilts missing labels. Or, at most, they only have a name tag on them.


The label of the quilt needs to serve in place of you, the blog post, or the Instagram hashtag. If you've made the quilt well it could outlive you. If it is a gift it could travel to places you couldn't have imagined. The label should allow the story to move with the quilt.

What do you include on the label? Here are the basics I always have:

Quilt Name
Brief description of the why/how of the quilt. That is, who is it for? Why did you make it? Was it inspired by anything in particular?
Pattern credit or original design.
Materials in the quilt - batting and fabric and thread. (Are they 100% cotton or otherwise? Also brand of batting.)
Date the quilt was completed.
My name.

It may seem like a lot, but it isn't too bad. This is what one example looks like.

My preference is to print my label out on the special fabric that can go through the printer. That way I can have it smaller. At one point I used to print the label out on paper and trace it. That was a lot of work! Sometimes it is quick and easy, some notes on a piece of fabric and sewn down. My favourite product for labels is Printed Treasures. It isn't cheap, but I can get 3-4 labels on a sheet, making it more economical. And I've learned, the label looks better if you put it on before you wash the quilt because the Printed Treasures fabric shrinks differently than my quilts.


One thing I was taught early on in my career is to sign my quilts in a secret spot. This is especially a good idea when you are gifting a quilt. Labels can be removed and quilts stolen. For family in nursing homes, kids in dorms or camp, or anywhere there is common access having a secret little spot for a label is a way to identify the quilt if the label gets removed. I've seen people actually make their label before quilting and it is a permanent part of the quilt. Even silkscreening a panel with it and sewing it into the backing! If that isn't your speed, simple sign your name on the inside of the binding. Be consistent on which corner you do it, like lower left. If a label ever gets removed and ownership is contested you can undo a few stitches and your name is visible.

When I updated my goals the other day I should have added 'Making Labels for All the Quilts' to the list. Definitely need that on the list.

25 June, 2015

A Year of Talking Quilts - First Cuts


There are generally two camps when it comes to cutting fabric - those that are nervous to do it and those that can't wait.

The nervous ones of us are worried about wrecking the fabric. Worse than that, we've put the fabric on such a high pedestal that a rotary cutter is far, far beneath it. In that case, the fabric is so awesome it can't be cut.

We've all been that quilter at least once.

Most of the time, however, we can gleefully cut up our fabric, excited at what is to come. Cutting represents the first real hands-on step of making. Before we cut it's all been scheming and dreaming. Before fabric is cut it only represents quilt potential.

That, by the way, is precisely why we should cut it. Fabric isn't a stock or money in the bank. It's value only comes from being used. Admiring it on the shelf lets you know that there is more pretty in the world, but actually using the fabric for what it was intended for, gives it true value and purpose.


Just like there are two camps when it comes to fabric I find that there are two types of cutters - those who cut every single piece of fabric out before they sew a stitch and those who cut as they go.

The first group are generally following patterns with very specific instructions. Indeed, patterns are almost always written with cutting instructions first. Gets this bit out of the way so you can get to the real business of sewing. But if you make a mistake and don't have extra fabric, then you need to cry or get creative. Or both.

The second group cut as they go. A little bit here, enough for a few blocks there. It is more stop and go, for sure. But it is really just another route to the same finish. If you are improvising, testing a concept, or unsure how many blocks you want to make, this is likely your chosen path. This route can both save and waste more fabric, depending on how much you cut and end up using.

Personally, I don't often cut everything first. When I am designing quilts for publication, this is when I do it. In that case I usually draft the pattern, check my math a million times, then cut everything. This effectively gets me testing my own pattern. If I have to, I will go back and make changes or cut more. But when I do cut first I am always surprised at how quickly it all comes together afterwards!

Because my true love is improv piecing, and often using scraps, it isn't often that I am spending a lot of time cutting and prepping for this kind of sewing. I might grab scraps and start, or cut a bit and play. After stopping and regrouping I will decide what more I need. Or if I even need more.

No matter what kind of quilter you are, there is something so satisfying about the sound the rotary cutter makes. Almost like the scrape of wet sugar on a plate, but uniquely its own. It is always the start of something good.


Since we're talking about cutting, I wanted to give you a few tips on successful cutting:

- Always have a sharp blade in your rotary cutter. If you are getting frustrated with your cutting, change your blade.

- Cut to the lines on your ruler, not your mat. (In fact, I have my mat flipped over so it is a soft grey, not that awful green).

- Before you make your first cut, and periodically as you cut, square up your fabric. Almost everyone tells you to line up your selvages, line up the ruler on the fold, then make a clean cut on the edge. Just make sure that when you line up your selvages the fabric is hanging straight. If it isn't then you need to shift the selvage edges right and left until it does.

- Make sure you close and lock your rotary cutter after every cut. Every. Single. Time. Even if you are the only one in your sewing space, please do it. I've seen too many injuries from open cutters. Better yet, invest in a retractable one.

- If you do not have the luxury of a cutting table, use your kitchen counter. Your back will thank you for the extra height. That is, unless you are short and it is more comfortable on a regular table.

- Never leave your cutting mat in direct sun or in a car. Then warp and will never go back in to shape.

- Replace your mat every few years, more or less depending on how often you are using it. Self healing only goes so far. But if you are cutting based on the lines on the ruler, not the mat, you can rotate and flip it to give it a longer life.

- This should go without saying, but pay attention to what you are doing when you are cutting. Trust me, my missing fingertip can explain to you why.

This is the fourth post in a year long series on all the steps of making a quilt. Musings and thoughts on the process. 

28 April, 2015

Tips for Cutting and Sewing Voile


After posting my Precious - all voile quilt I've had quite a few emails and some comments about the quilt's construction and working with voile.

Voile, while a woven cotton, is not exactly the same as the quilting cotton most of us are used to sewing. It is thinner and silkier. That means it requires some special handling. Nothing fancy, just a bit of care.

Tips for Cutting and Sewing Voile

1. Pre-washing does not make a difference to the feel of the fabric - so go with what you generally do when it comes to pre-washing.

2. Starch or not? I can't say here as I am not a starch user and did not experiment. Again, I think going with what you are comfortable with is going to work for you. But because you pick voile, in part, for its softness, you will definitely want to wash the finished project before using.

3. The ruler will want to slide while you are cutting. Keep your pinky finger of the hand stabilizing the ruler off the edge of the ruler, right next to it. This helps hold it in place.

4. You can cut more than one layer at a time. Voile is much thinner, so I cut with my fabric doubled up.

5. Make sure your rotary cutter blade is sharp. Of course this should always be the case, but the voile seems to snag a bit more.


6. Be careful to keep it right sides up. It can be hard to determine right versus wrong on some voiles, so stack and keep organized accordingly.

7. Use your walking foot for sewing. Or a dual/even feed if your machine has it. This is an absolute necessity. (At one point my dual feed was turned off and I wrecked fabric trying to sew. It took me a lot of swearing to figure out the simple fix.)

8. If pinning, use thin and sharp pins to make smaller holes and not have snags.

9. If you don't already piece with a 75/11 or 80/12 needle do so for this. Personally, I'm a fan of the Microtex Sharps for piecing.

10. You can absolutely mix voiles with regular cottons. They sew together nicely. Use these same tips, even when combining the fabrics.


As for how I put together this particular quilt, it was totally random patchwork. I collected the fabric, cut out a bunch of random triangles, and sewed them together.

Fabrics were gathered from all over. Mostly on-line sources. The selection of voile continues to grow and there are more and more geometric rather than floral options. That gets me very excited and makes me want to make another all voile quilt.


To cut my triangles I used the 60 degree ruler from Marti Michell. You could easily create your own template too. I liked this ruler because while it did give the options to cut different sized triangles it was a larger triangle when used as a template. Frankly, it was the size of the ruler that dictated my own triangle size. Cutting was made a lot easier that way!

Two other things I liked about this particular ruler. One, the little notches on the corners are great. It is so much easier to cut those triangles off before you sew, rather than after. And you do need to cut them off to reduce the bulk in the corners. And two, the guidelines in the centre help you cut the half triangles for the edges of each row, with the correct seam allowance.


Once I had a pile of triangles cut I sat down and sewed. Working on two rows at a time, I sewed one triangle to the next. For the first rows I kept sewing until I thought I was long enough to cover my bed, checked and rechecked that measurement, then finished each row with a half triangle. Once I had enough rows together I used my bed as design wall. Because it was inevitable to have some triangles line up from row to row I embraced that and moved things around for intentional diamonds.

Thank you so much for all the questions and compliments.

Now, as for those giant pencil crayons in the first photo on the post, wouldn't that be cool? Alas, they are just old posts of some sort.


30 March, 2015

Playing With Pinwheels in Quilting - On CreativeLive


When was the last time you played? I don't mean get on the floor and play with the kids or grandkids? I don't mean kicking around the soccer ball either. No, I mean going into your fabric and making something for fun; quilting without a quilt a mind?

I'm going to venture a guess that it hasn't been lately. For all the things I start - and I do start a lot - they almost always are started with a finished quilt in mind. I'm not sewing for the sake of sewing. I don't experiment or play much. And this is so, so wrong.

That's because we learn so much when we play. Taking away the play instinct for a child isn't a good thing, we can all agree on that. So why do we think it is okay to do that for ourselves? By playing as quilters we get the chance to explore colour, construction techniques, shapes, lines, negative space, secondary designs, and our own challenges and joys. Instead of trying a new quilt pattern to experiment with just one or two of those things, just play. See what happens when you let go of the idea that everything has to be a quilt.

It is the move past this idea that everything has to be something that has to be tackled first. In this CreativeLive class, Playing with Pinwheels in Quilting, I want to help you do just that. We take a simple, common block - the Pinwheel - and turn it into so many different things. There is one basic way to do it, and then a million other ways. While I preparing for the class I had a hard time stopping. One idea begets another and another. Even while teaching the class on set I had even more ideas. 

Guess what? Playing is FUN!

Now I feel like I could take so many of the ideas from the class and turn them into quilts of their own. The blocks I made may or may not turn into a quilt as they are. I, frankly, don't care. They represent my own little quilty playground. Not to mention design opportunity. For now, they are on my design wall to remind me that play is fun, that exploring an idea or a shape is worthwhile, and that sometimes things are simply pretty.


If you have any questions about the CreativeLive class, don't hesitate to ask. And all feedback is welcome. They are new with quilting classes and constructive comments can only help. Did you know there are free previews of all the classes? 


You can also share reviews and your inspired work with the CreativeLive community. I keep up with the course pages, so please share your work (in addition to blogs and social media if you are active there).


23 March, 2015

Improv Quilting Basics - On CreativeLive


Oh, Improv!

After years of teaching improv to quilters I know firsthand that it isn't something that comes instinctively or easy to many. I also know that it isn't as difficult as many believe either. It is a technique that can be taught and learned, if you embrace it and not fight it.

My latest CreativeLive class is all about Improv Quilting Basics. I walk you through all the steps from preparing fabric to turning blocks into a quilt top and even quilting tips. So often I see improv discussions that talk about the process, but they never move beyond making a block. There is very little public discussion on how to actually turn those efforts into a quilt. That discussion is precisely the bulk of this class.

Whether you want to go with total improv, are looking for more structure, or just want to play and see what happens, you can get direction for all that from this class.

The studio students worked on two different projects in teams. You will see how they went from a pile of fabric to this small tops/start of big tops in just a few hours. The first group - Karen and Tracey - worked with some neutrals. It was a collection of solids and near solids that I put together with some fabrics from the Calligraphy challenge on Spoonflower, hosted by Uppercase Magazine. (In my head it was called the Ink quilt.) They worked from a pure improv standpoint - they cut up fabric, sewed it back together, then puzzled it to turn it into a quilt top.

Nicki and Michelle worked on a stack of low-volume fabrics (a nice follow-up to the Quilting with Low Volume Fabrics class) with pops of red. The combination was from a student in Inuvik and I'd wanted to see it in action again. In their case they built up their improv blocks and we squared them up. In the class we talk all about the tips and tricks for building improv slabs this way and considerations when putting them together. And look, they've finished what they've started too!

The whole time the students were sewing I was playing myself. You get to see that too. I show yet another way to put a quilt top together and discuss more options. Not to mention a tiny trunk show of some of my favourite improv quilts.

At the end of the day I want my students in Improv Quilting Basics to feel totally comfortable working improvisationally. That means different things to different people. But having improv in your skill set can mean so many things. It doesn't just have to mean that you make slabs or totally improvised quilt tops. It is about embracing a spirit that means you don't freak out when you run out of background fabric, or gives a you language to translate your inspiration. Improv means trusting the process.

Oh, and in case you were wondering, I let the studio students keep the work they made. I only asked that when they finished that these quilts be donated to charity.


09 December, 2014

Quilting - K.I.S.S.


In the real world I hover somewhere between planning as much as possible and flying by the seat of my pants. I used to plan everything, research it all, and know what I was doing before I took a step. Then I met my husband, a very, very spontaneous person. And I became a mom, where planning causes more anxiety at times than learning to go with the flow. So now, I occupy a lovely space of chaos somewhere in between.

It is no different with quilting. I adore improv and hand appliqué, I write and make precision pieced patterns, and I will happily straight line quilt as much as I will free motion.

All that being said, I learned a lesson in the past week.

I had a stack of tops and backs ready to go and an appointment on the long arm. I had plans for what I was going to do, or at least ideas. The first quilt went well. Even when I changed my quilting plan as I loaded the quilt top on the long arm. The second quilt was a fast make - I had an idea and made the entire twin sized top in a few days. I thought I knew exactly how I would quilt it. It got loaded up, I checked my tension, and went for it.

And right away I knew it was wrong. But I kept going because, hey, I'm here! Can't waste the time! I finished one pass across the quilt and stopped. Staring at it wasn't going to make it any better. My stitches were fine, but the pattern I went with was totally wrong. The idea surpassed my skills, for sure. It was also too fancy for the quilt.

So I tried something else. And that was just as bad.

I was totally overthinking things. But I was convinced that because I was on the long arm I had to do something MORE than the usual. So after some frantic texts to Andrea and chatting with my friend Phil who watches over the renters I decided to cut my losses and take the quilt off the frame.


Ahead of me looms hours of unpicking my quilting. But that is better than the alternative - giving away a quilt I cringed over. Sure, it is only a gift for a 5 year old boy. But I love that boy as much as I love my own kids, he deserves some quality work.

I will head back to the long arm and not only quilt something closer to my skill level, but also more appropriate for this quilt. This was a painful reminder that simple can be quite good, quite perfectly imperfect.

Don't get me wrong, I do indeed believe in continually pushing ourselves to improve, to be better. And the only way to do that is by doing. But we also need to give ourselves and our quilts perspective. This isn't a show quilt, it doesn't need super dense quilting. It's going on the bed of a thoughtful and funny little boy. It will be jumped on and barfed on. The dog will also find it cozy. It will hopefully last him long enough for me to make him a quilt when he leaves home and has a bigger bed.

I need to take some of my chaotic energy and calm it down with both a clear plan and a sense of adventure when it comes to this quilt. Something all over so the piecing shines and not some awful quilting. I'm going to unpick those stitches and keep it simple, stupid.

11 June, 2014

Sewing Room Injuries


No, things have not been that stressful in life that I felt the need for drastic action. It sure looks like it though. I just accidentally touched my arm on the iron last week. This latest burn is healing nicely. It criss crosses a previous burn. And goes nicely with the other two scars on my arm from the same type of injury. Quilting is a dangerous activity!

It is dangerous indeed. We use sharp tools all the time. Hot tools too. All while creating something soft, cuddly, and beautiful. Here are some of my quilting injuries:

... Burns, as described above.
... Dropped a ruler and caught it with the top of my hand, where it landed on the corner and dented my hand nicely.
... Sewn my fingertip to appliqué (just a flesh wound, but a dramatic look).
... Sliced off the tip of pointer finger with the rotary cutter. Pay attention when cutting and don't look away because someone called your name from the top of the stairs. Or else you might almost require a skin graft, if it wasn't for having a brother who is a doctor who can bandage you up properly. And it is nice to be able to keep cutting and do simple things like flick on a light switch with that finger.

What about you? What are your sewing room injuries?

21 May, 2014

Slump

Wandering aimlessly and picking bits of thread of my shirt...
Moving, sorting, and removing piles of fabric...
Taking out old projects to fondle but then putting them away...
Packing up quilts to put in the cupboard because I don't need to see twenty of them laying around...
Blank sketchbooks...
Being way too interested in my daughter's Rainbow Loom...
Procrastinating on promised gifts and volunteer commitments...
Letting the clutter accumulate...

There isn't much sewing going on, other than the mindless nature of my hand sewing. Definitely no starting of anything. I am the major league hitter with a mid season slump.

Finishing the manuscript, I'm sure, has a lot to do with it. With the previous two books I had something to jump into as soon as it was done - like a new baby or the next book itself. So there wasn't any time to decompress or wallow. Just boom! And on to the next thing. Right now there is no next thing.

I've also had to make the very tough decision to back off teaching for a while. I'm still teaching, but I will not be travelling much for it in the next year or so. It was about to take off in a very good way, but that professional success came with personal sacrifices I wasn't quite willing to make. It is absolutely the right decision, but that doesn't make it easy to live with. I LOVE teaching and the travelling and meeting people... I will miss it for sure but am thankful for the local opportunities coming up.

Without a doubt the state of our house is getting me down. Personally, I can't stand clutter. But I live with 4 people who aren't bothered by it at all. They love me, but they can't quite get themselves to tidy up enough. I can nag more, but that won't do any of us any good. I stay on top of it as best I can, but the bitterness grows and the frustration peaks. Then, when I do buckle down for a good clean up I get cranky because I touch the broken cabinets, the tuck tape never coming off the wall, the unfinished bathrooms, the carpet remnants laying around. I try to keep my studio clean so that can be just my refuge. But still.

It used to never bother me that I have so many UFOs/WIPs, but that might be the problem. That is a form of clutter, after all. So I've got two quilt backs now made so those tops can go to a long armer. And I've puttered with a few of the projects to see if that helps. Fine and a little bit fun, good to keep the muscles moving. They aren't getting me super excited though. At some point I should get a bit more motivated and sort through them all while taking a good hard look in the mirror. What is going to get done and what is not? Then move on.

Regardless of the reasons, I'm itching to find my mojo again. 

A bit of it came back over the weekend. We took a gorgeous drive to a beautiful spot to spend the weekend with precious loved ones. I flipped through trashy magazines, stomped in the forest, taught the girls how to canoe, ate a lot of cheese, and obsessed over pregnant elks. Somewhere in there an idea for another book emerged. It was so invigorating to have that creativity spurt forth. And to know that I was still receptive to new ideas.

You see, I believe that we have to exercise our creative muscles and put the work in to keep us going, but that is no guarantee of creativity. It only makes sure we've left the doors and windows open for the butterflies. But if your butt isn't in the seat doing the work, the beautiful creatures will pass right by without you noticing. Creating isn't inspiration, it's work.

In this slump, however, I have been literally slumped over. Head down, moping, shoulders hunched, and eyes closed to the world. My muscles are working, no doubt about that, but I am not open to the space and forces around me. It's just too internal.

In the past I find that pushing myself for charity work is the way to opening up. It gets me out of myself. Thinking and doing for others. Right now I am still doing that though, as I try to wrap up the last Just One Slab quilts. Confession: even these feel like they are dragging me down right now. But I keep plugging away because they are more important than any of my own sluggishness.

It won't last forever, that I know. Sometime soon I will have something to show you. Even just voicing all this seems to be pulling my shoulders back. I've also identified a short list of my own suggestions for getting through.

- Keep sewing. Keep your muscles moving, your brain activated to the process.
- Finish something, anything.
- Take inventory of the WIPs, admit that you won't finish some and pass them on.
- Wash the windows, or get them washed. New light, clean light will highlight the path and let the butterflies in.
- Try a new technique.
- Give away a quilt, a finished quilt.
- Say no to a commitment.
- Get up early to sip tea and do nothing in the quiet morning light.
- Colour, paint, or create with your kids.
- Turn off the computer, walk away from Pinterest and Instagram
- Put away the inspirational stack of fabric you pulled out two years ago. 
- Sign up for a swap or bee.
- Take a road trip, even if just for the day.
- Have faith in yourself.

Do you have any other suggestions of your own to share?

For now I am enjoying my quiet mornings, even if they aren't all that productive. I'm working on a quilt that is a gift (I'll share when I'm done). I'm prepping for a round of teaching gigs and a family trip to Toronto. And I'm writing a proposal for a book I can't start for at least 6 months, but I've got to run with what is getting me excited. Summer is starting soon - the emerging blossoms (such a late spring) and energy of the kids is indeed invigorating. Today, today I will stand up a little straighter and keep my eyes open for butterflies.


04 April, 2014

Friday Favourites - Brayer


When I was finishing that Hot, Awesome Mess I had the chance to use one of my favourite sewing room tools. It is called, as far as I know, a brayer.

Typically, a brayer is used in the print making process. It is a flat roller designed to apply consistent pressure across the surface - perfect when applying ink. But thanks to the awesomeness of my friend Jules, I am now obsessed with using a brayer when I improv piece.Jules was a volunteer in the Denyse Schmidt Improv class. Having already bonded over motherhood and BBQ she happily shared with me this handy tool as we went through the day.

It works as a mini iron, pressing short seams right at the table. Now, it isn't as good as an iron, but it is infinitely better than finger pressing. It provides a crisp edge and allows you to continue to sit and sew for a while before getting to the hot iron.

And, because Jules is pretty great, she sent me one all the way from Australia because I couldn't find one here. If you ever see one I strongly recommend picking up one, or two.


13 September, 2013

Friday Favourite - The Kwik Klip


My least favourite part of quiltmaking is basting quilts. It really is the reason quilt tops languish in my closet. I think I'm slow at it, that's part of the problem. And now, with our TV in the basement, I can't rope Hubby into helping me anymore! I baste on the living room floor. When the TV was up here he had no choice - watch me get in his way or get on the ground and help me. Now he runs away to the TV as soon as he sees me pull out the masking tape and pins.

Loving me is not enough, the only reason he was willing to help me is that he was allowed to use the tool involved. Men and tools, right? Man oh man, he can wield a Kwik Klip like the boss.

Honestly, if it wasn't for a Kwik Klip none of my quilts would get basted. I am a pin baster, and I use a lot of pins. (I didn't think it was a lot, but then I saw people commenting on an IG photo of someone else's basted quilt. So many pins! Wow, you sure use a lot of pins! And there I was thinking that it looked totally normal. But I don't get puckers with my quilting. Happy for that trade off.) So the Kwik Klip makes very short work of closing all those pins. And it saves both what is there of my nails and my fingertips.

You simply hold the tool in your dominant hand, lift up the straight part of the pin, and clip it into place. Done. I've heard of people using an old teaspoon to the same effect. That, however, is not as fancy as the tool. And seriously, if a tool is what it takes to get your man to help you with the basting then a tool is what you should get.

I'm sharing this post as part of National Sewing Month, brought to you by The Sewing Loft. Check out a month long list of sewers sharing their favourite tools.


22 August, 2013

Ring Tutorial


In my Craftsy class: Inset and Applique Circles by Machine I had a request for a short tutorial on making a ring, instead of a circle. It's an effective design and a great adaptation of a single technique.

1. Gather Your Supplies
Paper scissors, sewing scissors, compass, freezer paper templates, fabric glue, and fabric for the background, ring, and inner circle.
I've made this a 12 1/2'' by 12 1/2'' block. So my background fabric is cut to the same size, as are my freezer paper templates.

2. Make Templates
For this ring I've used an 8'' circle and a 4'' circle. You need two separate templates. From your 12 1/2'' by 12 1/2'' squares draw and cut out your circles.


3. Insert The Circle
For this block we are using the Reverse Circle technique reviewed in Lesson 3. This technique achieves the look of an inset circle with no headaches and consistent results. Use the first template, the 8'' circle, to start the block.
You can see in the photo above that I haven't trimmed my excess circle fabric after sewing it in place. Do so before you move on to the next step.


4. The Second Circle
Apply the template for your smaller circle to the block of the block, after trimming, from Step 3. Prepare for sewing the same way your did the first circle: cut out and opening - leaving seam allowance, fringe the seam allowance, press back, glue, apply fabric, then sew in place. Only this time your background is actually the first circle.


Here is what it looks like from behind, before trimming.


And after trimming.

What a great effect, right? Don't hesitate to adapt this technique. You could try off center rings, circles within ovals or vice versa, and maybe even multiple rings. The design possibilities are endless!


Love the example, but want to learn more about the technique? Don't forget you can sign up at any time for my Craftsy class: Inset and Applique Circles by Machine. Access it on-line, anywhere, whenever you want!


12 July, 2013

Friday Favourite: Easy Thread Sewing Needles


With a million threads to bury on that beast of a quilt I pulled out these needles. They were part of some swag in the Denyse Schmidt Improv class from QuiltCon and they originally come from Purl Soho. I put them aside after trying them for binding. (Not a good use there - it cut the thread sometimes and was thick for getting through the small edge of the binding.) But I find them absolutely perfect for burying threads.

I must admit, I never used to bury my threads. I just stitched once or twice where I started then cut flush. Frankly, I was lazy. But the finished look was nowhere near as neat. So now I spend the evening burying threads and am much happier with the finished results. I do tend to wait until I'm done all the quilting so it can add up to a fair amount of work, but I find it easier and it doesn't break with my machine quilting rhythm.

I do exactly the same technique as Amanda. And these easy thread needles are perfect for it. They save you trying to thread two threads into the eye of the needle, and having sit awkwardly in order to use your eye, at eye height, to thread what are likely to be short threads attached to a heavy quilt.


Oh, and in case you were wondering about the intensity of that quilting, here is my thread. Can you see it? That's 1000 meters of thread per spool! I used one whole spool and then some.


08 July, 2013

Snippets on Dates


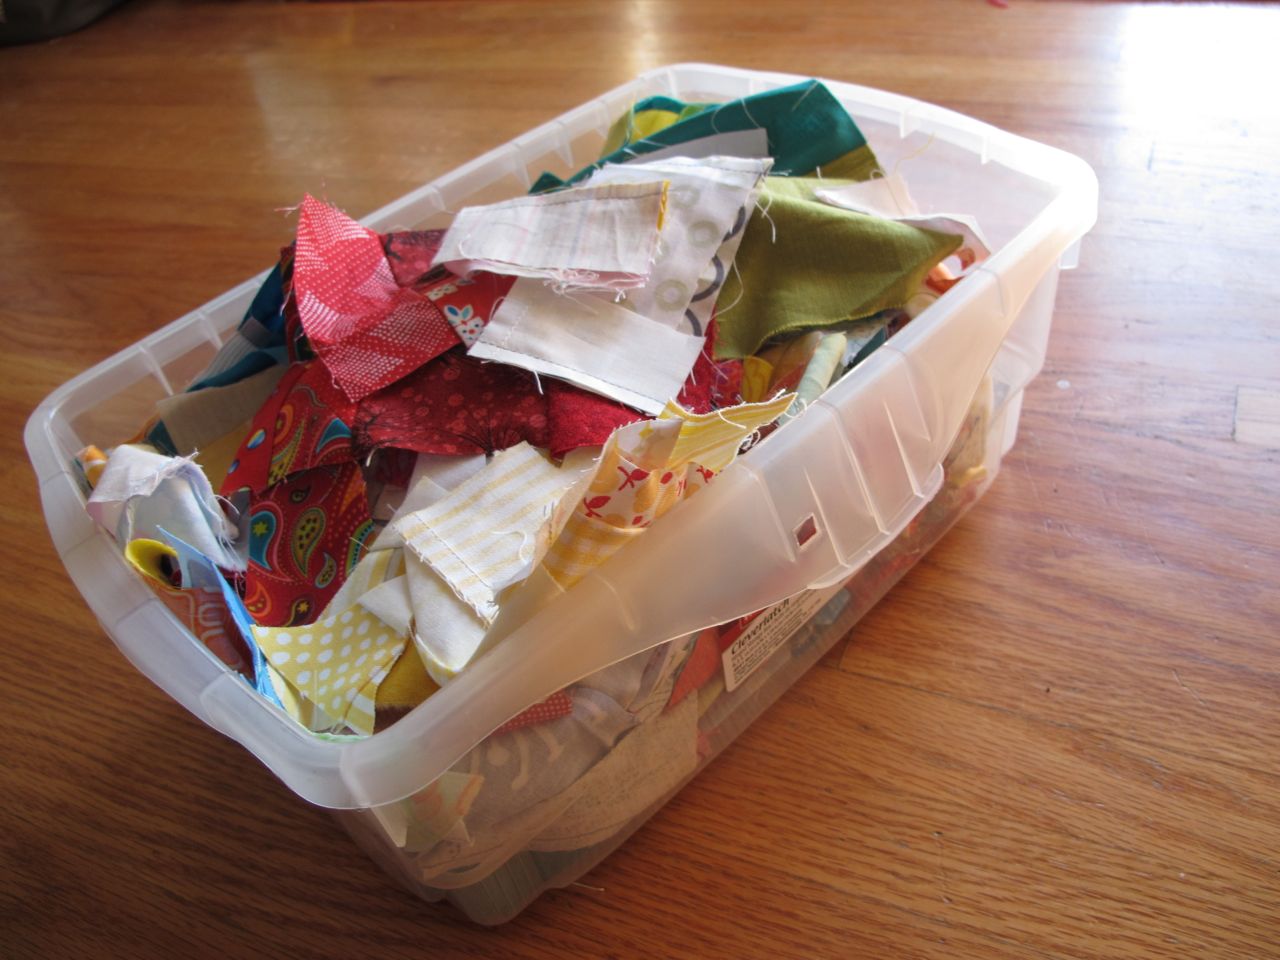
For the last two or three years I've kept this bin of fabrics scraps by my side while I sew. It sits next to one of my big glass jars full of seemingly useless snippets of scraps. Tiny pieces, big pieces, odd pieces. They all live together in the hopes of becoming something more.

Slowly, slowly, they are indeed doing that.

As I sew, particularly improv sewing, I use these little bits as leaders and enders. That is, instead of having dangling threads on every single seam I often grab two snippets and sew them together. At the end of a moment of sewing I have a new collection of pairs.


Some pairs are small, some a bit larger, and some teeny tiny. Eventually, they will all get sewn together into some kind of crazy, hot, scrappy mess. And I will love it. For now, however, they are still sitting in pairs, like some sort of speed dating event.

On the weekend I wasn't in the mood to sit while we watched UFC and Le Tour at the end of the night. So I set up my iron and finally tackled the pressing of these lonely dates longing to be part of the crowd. And three hours later I wasn't quite done, but I made a good dent.


Now it is time to create a new set, by sewing these piles together. And so on, and so on... It really is going to be chaotic when done, but I'm pretty sure I'll love it. How can I not, when I have these little precious combos littered throughout?


Keep these leaders and enders in mind when you're making your slabs. Makes the process faster and neater.

05 June, 2013

Ten Tips for Machine Quilting Large Quilts


Still quilting...

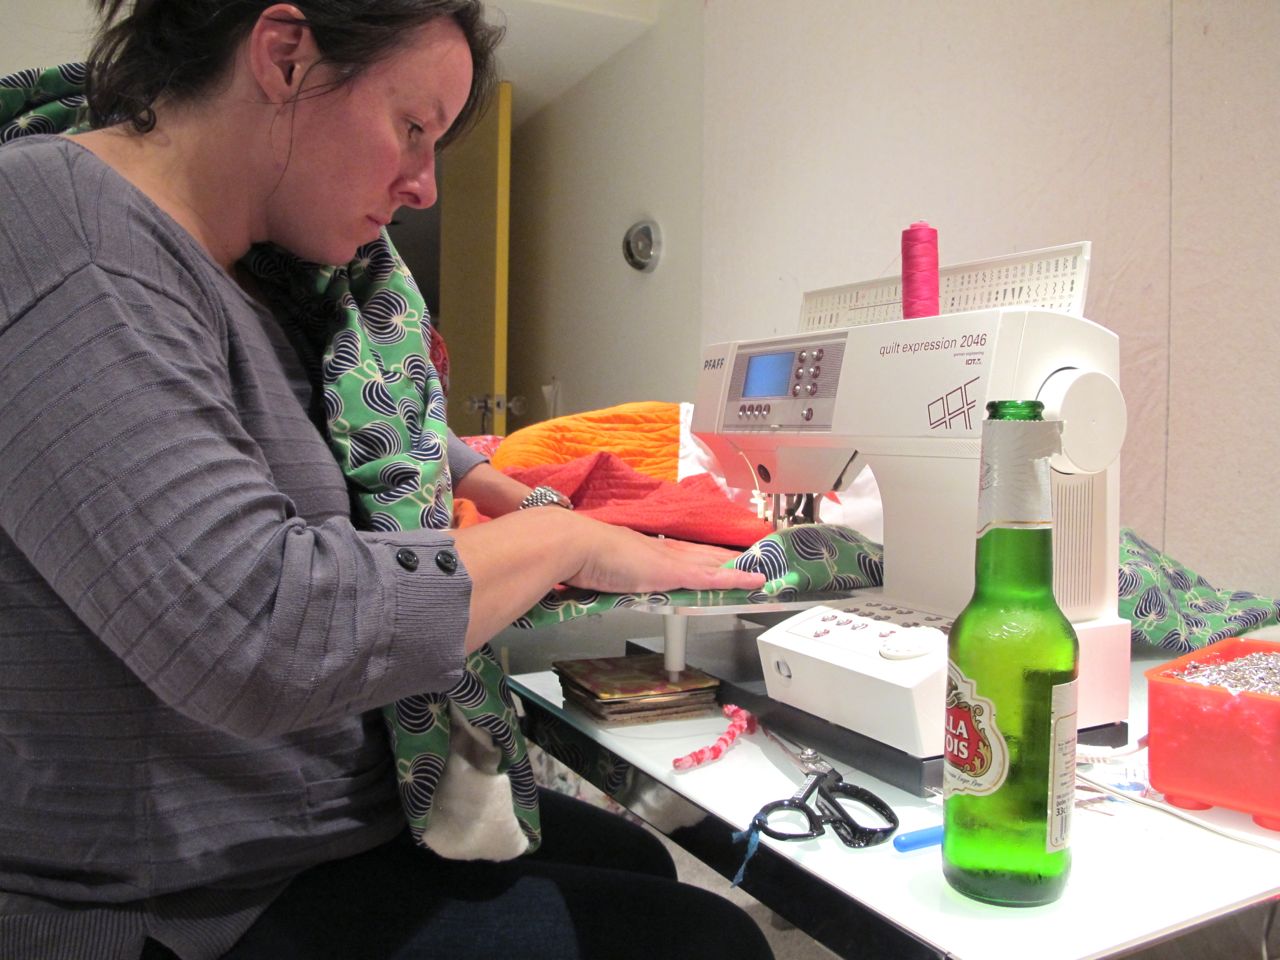
Yes, I'm working on a king sized quilt on my home machine. Some of you expressed surprise at that, some wished me luck in that kind of evil way where you don't actually believe I can do it. Or at least it seems so incredulous that it comes across that way. I get that, I totally get that. But I'm here to tell you that it is totally doable. You just need a few tricks up your sleeve.


1. Have support.
Not the kind that stands behind you and cheers you on as another row of stitching goes in, although that is indeed helpful. Rather, make sure your quilt if physically supported by a table, your body, the wall, etc. You don't want your quilt hanging off the table and pulling as you try maneuver it through the machine. For this one I've kept my table against the wall instead of the middle of the room to make sure the quilt doesn't fall off the edge.

2. Break it down into smaller sections.
It is daunting to stare at a large quilt and even think about quilting it. Break it into sections, even if it is only mentally, to make it seem more manageable. Perspective is everything. And just like when you are trying to lose weight and you reward yourself as you reach 10 pounds of the 40 you need to lose, give yourself a treat as you finish a section.

It also helps to approach the quilting in sections so that you can roll, fold, and position the quilt for each section. This makes supporting and moving the quilt easier.

3. Have a beer.
Or a glass of wine or even a stiff scotch. People often say that having a bit of a tipple helps loosen you up for free motion quilting. Even if you are doing straightline stitching on a large quilt, being a little loose helps. And having to stop and move your arms in another direction is a very good thing. If water or tea is your preference, keep something by the machine. Quilting is thirsty work.

4. Take breaks.
Big quilts are heavy, very heavy. It takes a lot out of your shoulders, neck, and upper back to quilt these beasts. I can do about an hour at a time before I feel the tightness creep in. Then I have to get up, stretch, do a load of laundry, or actually attend to the kids. I feel like I accomplish a lot when I get a solid hour in but my body feels it.


5. Prewind bobbins.
Having a bobbin run out is inevitable. And while the bobbin change is a good time to stretch and take a break, it can seriously disrupt your rhythm if you are in the groove. I wind 4-5 at a time on these large quilts. It's just nice to be able to grab and go when a change is needed.

6. Keep clean and sharp.
Every time you change your bobbin clean out any lint from the bobbin casing or around the needle. And speaking of the needle, you will definitely need more than one on a large quilt. I tend to change mine every 6 hours of quilting or so. I want a sharp needle and clean machine. It means less headaches while quilting and better results.

7. Raise it up.
It is a lot easier to quilt on a large flat surface. I have a special plexiglass table that is made for my machine that gives me a large surface to quilt on. If you can get one for your machine, definitely do it. Or if your machine drops into a table, great! (Just make sure the table is big enough to support the quilt, or add side table while quilting.)

8. Sit higher.
Without 1-2 pillows underneath my butt while quilting I find that I am too low to be comfortable, especially once I've put my quilting surface on the machine. But raised up a little saves my neck and stops me from hunching horribly. If you are getting really sore, try sitting up higher.

9. White noise.
Yes, the sewing machine is noisy but I need more noise while I'm quilting. Music is great (and oh so necessary for piecing) but I prefer TV while quilting. Not TV I need to really pay attention to because that is too distracting. Movies or shows I've seen are best - like a friend keeping you company. For example, I've had Downton Abbey on while working on this beast. A third of the way through the quilting and down Season 1 and a few episodes of Season 2.

10. Don't forget to breathe.
Seems obvious, I know. But I am not immune to the tendency to hold your breath as you do a pass with the machine. Push the pedal down, hold breath. Release the pedal, breathe. It's a bad habit and one that is necessary to break. Even breaths as your sew keeps your mind and muscles working well.

Don't let the size of a quilt scare you from quilting. You can do it!

15 April, 2013

How Do You Finish Your Quilt Bindings?


Okay, I've got a question about binding. In between finishing up my daughter's quilt and some surfing I've been thinking about binding a lot the past few days. Plus, it was a nice distraction from the real world.

Machine Binding
- Can finish on the front or the back.
- Very fast.
- Clean look, but with a very visible seam.
- Great for quilts that live primarily for trunk shows.

Hand binding
- I actually enjoy hand finishing.
- It feels like a very personal touch on a quilt.
- More or less no seam line on a finished edge.
- It does take some time.


Personally, I've tried a few methods for finishing binding. My preference is for hand-finishing, but I've got nothing against a completely machine bound quilt. I do machine binding on quilts that are not gifts - class samples, trunk show quilts, even some book quilts. Hey, when faced with a looming deadline a girl does what a girl has to do!

Let me be clear. I do not feel guilty about machine binding, nor do I judge anyone's method for binding.


One thing I have noticed, however, is that for those who hand finish, stitches seem really far apart. I see these perfectly flat binding edges that are stitched down. It's one thing to not see any stitches because the quilter is just that good. And there are many, many techniques for hand stitching a binding. But people, you need to put a stitch closer than every half inch! When we quilt we call those big stitches in the quilting itself "toe catchers". On a binding I would call that a disaster. That is the place a quilt wears the most and having large, maybe loose stitches is asking for a finger to pull it out at the first chance it gets caught.

I'm perfectly willing to admit that I'm rather anal about my own hand finishing  - having my stitches come in between 1/4'' and 1/8'' apart. So yes, this takes me some time. But I've also never had a binding come loose. This is my most common method for finishing, but I've used the ladder stitch and been pleased with the results. And I recently tried switching up my needle in placement - through the binding instead of the quilt back and liked the look and stability of that.


What about you? How do you finish your bindings?